Category Archives: Wargaming

Kromlech Orc Juggernaut Mecha-Armour

Today’s post is a collaboration with a good friend of mine, Stephen Hurley. Steve’s been playing Dem Orksies in 40K ever since dey was just Space Orks, and has been pestering Arthur over at Kromlech.eu for a heavier version of his Clanking Destroyer for customers to use as Mega Armoured Nobz. Apparently Arthur has endured said pestering for about three years now, but no more will he need to, because Kromlech have released the “Orc Juggernaut Mecha-Armour”.

And, oh, what a thing of beauty it is.

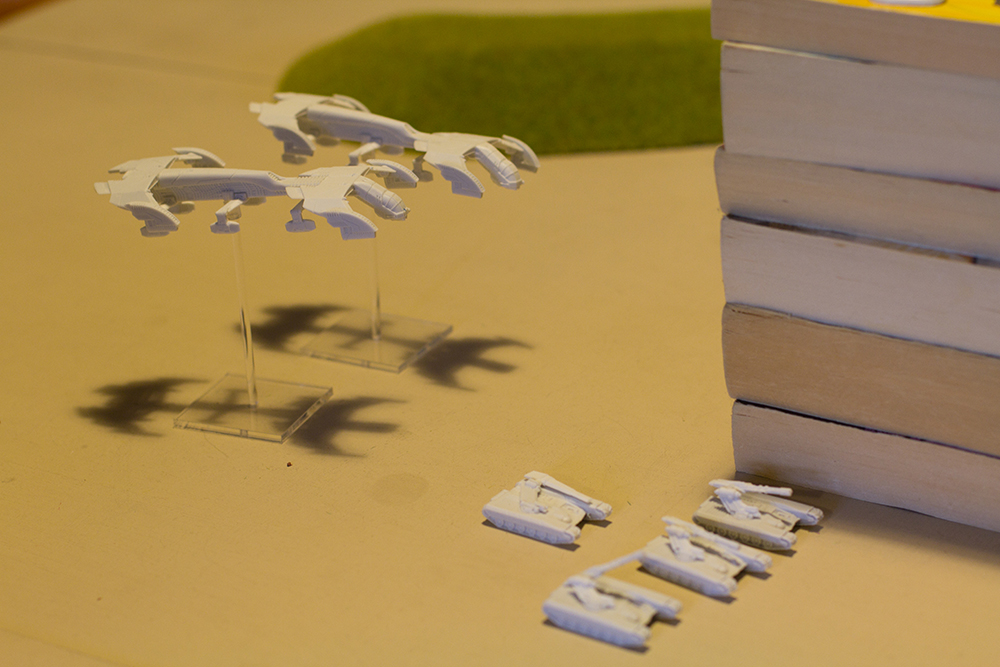
Naturally Steve had to order some, and plumped for the squad deal: three minis for $54.99USD. Ordering them on day of release, they arrived five days later.

Straight out of the box, the minis look stunning. The quality of the sculpt is outstanding, and the casting is near-flawless. In total there were only five tiny bubbles from the moulding across all parts. Considering how many little details are in the sculpts, this is far superior to Games Workshop’s record with Finecast.

Orcs

The models fit together seamlessly, although poseability is somewhat limited. If you want these Orcs in any poses other than you see in the video you’ll need to be comfortable with minor conversion work. There are also only enough components to make one set of three models. While the pieces are interchangeable, it would have been nice to have a few additional arms or weapon options available.

Still, they are considerably larger and more detailed than the Citadel Mega Armour Nob models. Their heavy and crude appearance fits the Orkish mentality perfectly.

DSC03240

We love these models, and I can’t wait for Steve to get on and paint them!

Overall: 9/10! A few options would have been ideal, but other than that, these are brilliant, and well worth the money!

Kromlech’s website has recently endured a Hacker attack, so if you want to get your hands on these, use their eBay store instead.

Tagged , , ,

DZC Battle Report: Four-Player battle

The battle report for my first ever game of Dropzone Commander is now available online. We played a four-player game at 1,000 points each, and there were two Shaltari armies, one Posthuman Republic, and one United Colonies of Mankind. The mission type was Recon, which placed Intelligence points within each building and on each hill, and the goal was to grab as many as we possibly could.

Without further ado, here’s the report:

Tagged , , , , ,

Assembling a Shaltari army

I had a very gaming birthday this year, as not only did my awesome fiancé get me a tonne of Magic cards, he also presented me with a Premium Shaltari Mega Army complete with aluminium case. As I had a 1,000 point game planned to occur over the weekend it was time to get a wiggle on and start putting these babies together!

Not having the time to assemble everything, I decided on my army list first, then only worked on the items I needed for yesterday’s game.

2013-02-24 11.58.04

The Braves were ridiculously easy to put together. Snipping them off their sprues was a bit heavy on the clippers, because the sprues were thick and these are the only metal minis in the whole army, but the figures themselves required zero clean-up. The bases had some minor flash and sprue that needed quick pruning.

2013-02-24 13.43.46

Spirit gates were more fiddly, but still assembled in a matter of minutes. Some light cleanup with a knife was required, but it was absolutely minimal effort compared to your average Citadel model.

2013-02-24 13.43.55

The Eden gates took the most time, largely because some of the resin was slightly warped and needed resetting with hot water. There was a lot of flash that needed scraping away, but this was easy peasy. The main problem was that the tips of the struts were merged in to the sprue joints so much that it was impossible to see where the struts ended and sprue began. As a consequence I cut too much off, and had to go digging among my offcuts to find the matching part, glue it back together, recut it in the right place, prune it down to the right shape, then assemble the gate.

Once I’d done this with one gate, though, I knew what to look out for in the remaining two.

2013-02-24 14.05.53

The Coyote and Ocelot were joys to assemble. I really love these little walkers and definitely think they’re the most appealing models in the army.

2013-02-24 16.23.00

All in all I assembled:

  • Six Braves stands
  • One Haven gate
  • Three Tomahawks
  • Two Yari with Microwave guns
  • Two Spirit gates
  • Three Eden gates
  • Two Warspears
  • One Coyote
  • One Ocelot

in the space of two and a half hours, and that’s including time to rectify my snipping error, and be excruciatingly anal about flash-pruning. An entire playable army, ready to roll the same afternoon. The resin’s even a fairly bright white-grey colour, so I didn’t feel quite so bad about playing unpainted minis.

The only thing to be wary of is how soft resin is compared to plastic. If you’re used to carving away at a mini to get it to where you want, you’re going to slice up your resin like a serial killer. Be gentle; that’s all it takes.


Tagged , , ,

Painting Witchfate Tor, Part 2

All right, let’s finish this beast! Part 1 covered painting the majority of the stonework; now we’re going to carry on with what’s left.

Step Four:

I got bored at this point and decided to make a base to sit the tower on. This took a little planning. I wanted a base that was large enough to stand a few minis on, but not so massive that it would be a problem to store and transport. Ultimately I cut a sheet of MDF to approximately 45x25mm and glued 25mm styrofoam to it.

The next stage was to place the model’s base in the centre and draw around it, then carve out about 3mm of depth for the base to nestle snugly into the styrofoam. This makes the setting look a little more natural, and prevents the model sliding around if a stray arm knocks it during play.

Once I was happy with the outline, I took a craft knife to the edges and began carving. This was a somewhat haphazard process, as I wanted the rock to seem authentic. At some stages I glued additional pieces of styrofoam to the MDF to create staggered layers.

To protect it from aerosol propellants and make it tough enough for play, I liberally smothered it in readymixed all-purpose filler and gave that a day to set.

Then onto the Chaos Black primer! The edges of the base were drybrushed slate to match the model, and the top was drybrushed with a variety of browns and greens to create a mud and grass effect. I wanted the ground to become increasingly dead as it neared the Tor, and finished the area nearest the outline with dead grass sprinkles and a nice dead tree. After that all it needed was layer after layer of Woodland Scenics Realistic Water with a splash of red to make it look like rivers of blood were gushing out of the cursed building! D’aww!

To make the dead tree, I shoved a toothpick in at the angle I wanted, snipped the top off to remove the point, and glued it into place. Then I added a clump of tan-coloured lichen, glueing it to the toothpick. Easy peasy. A few blobs of Scorched Brown to the toothpick gave it more of a bark colour.

IMG_1241

Step Five:

I then got it into my head that what I really needed in here was a flickering firelight. The most arduous part was drilling through the centre of the comet in the base of the Tor – the plastic was at its thickest there. And not being remotely capable at soldering I decided to cheat and picked up a box of dirt cheap LED tealights. Disassembling one carefully, I glued the LED into the hole I’d drilled (carefully pre-measuring to make sure it was going to be a snug fit), then cut the “flame” housing and glued that in place over the LED to soften the light from it.

IMG_1238

Step Six:

The top is painted using largely identical techniques to the base: Slate for most of the brickwork, grey for the accents, then washes of colour for the major flagstones and drybrushing lighter versions of the top. Note that the centrepiece is missing from this photo so that you can see how slack I get when I know something’s going to get covered.

IMG_1237

Witchfate Tor, Completed:

As you can see, the levels really don’t fit together very well. I haven’t forced them – they can be a little more snug than this, but I took it gently for the photos. I’m considering taking out the floors of each storey and pinning the tower together. This’ll make it less portable, but it’ll be sturdier and look better.

IMG_1233

IMG_1232

IMG_1226

IMG_1234

Let me know what you think!

Tagged , , , ,

Painting Witchfate Tor, Part 1

Witchfate Tor is a bugger of a model. Let me just be totally up-front about that. It’s badly moulded, and if you aren’t careful you’re going to cut your hands to pieces trying to get it into shape. It also falls apart pretty easily if, for example, your cat decides to shove it off a shelf. But I have no fear, and I have painted the beast!

Step 1:

I primed each part with Chaos Black. I prefer priming before assembly with some pieces, and as Witchfate Tor is round,  it worked better for me to do so this time.

Deciding on a colour scheme of slate and grey stones, I went crazy with the drybrush to start, laying down blocks of colour as a guide: Fenris Grey Foundation for the slate areas; Adeptus Battlegrey Foundation. You’ll already notice that I have pots of paint lurking around from before last year’s new range came out, but don’t worry: DakkaDakka’s Paint Compatibility Chart is here to help!

Witchfate Tor WIP 2

Witchfate Tor WIP 1

Step Two:

More drybrushing in the following order:

  • Slate stones: Shadow Grey; and Space Wolves Grey.
  • Grey stones: Codex Grey; and Skull White.
  • Door arches, skulls, and other stonework and carvings: A 70/30 mix of Scorched Brown and Chaos Black; Foundation Dheneb Stone; Vallejo Bonewhite.
  • Wood areas: Scorched Brown and Vermin Brown.
  • Roof tiles: 70/30 Scorched Brown and Chaos Black wash, arbitrarily painted over with Red Gore to avoid it looking too even.

Witchfate Tor Level 1

Witchfate Tor Detail

Step Three:

Time to focus on the flagstones in the base, just in case I ever want to use the base as a ruin. The entire base was painted the same slate as the majority of the brickwork, then overpainted with other colours. First a thin wash, then stippling on a thicker layer, before stippling the paint on neat (but dry). After that I made a 50/50 mix of each colour with Vallejo Bonewhite and stippled that over the lighter areas, then drybrushed the outer edges of each flagstone with it. Finally a drybrush around the edges with Skull White. All dark metallic areas are Tin Bitz, and the lighter ones are Burnished Gold, and skulls are just a drybrush of Vallejo Bonewhite.

Witchfate Tor Base 1

Witchfate Tor Base 2

The Completed Tower:

The floors are a tight fit, and it can feel heavy-handed forcing them to sit right, but I’m very pleased with the paint job so far.

Witchfate Tor Detail

Coming in part 2:

  • The top floor.
  • A hand-carved base.
  • Internal lighting.

See you soon!

Tagged , , , ,

DZC Battle Report: UCM vs PHR

Well, you’ve had my treatise on how brilliant Dropzone Commander is, and now at last here is the video from Sunday’s game.

The chaps played a 1,000 point game, with five focus points, and kill points as a tie-breaker should one be needed.

I can’t wait to get hold of my Shaltari army!

Tagged , , ,

DropZone Commander: Wargaming without a second mortgage.

There’s a new kid on the wargames block, and he’s kicking over the chairs and scribbling his name on the walls: DropZone Commander. Well, it might not be quite like that, but what it is doing is giving us a great new game for which you can buy all you will ever need for £265.

£265 for dropships, tanks, troops, a commander, a deck of command cards, custom-cut KR-Multicase foam trays, and an aluminium carry case.

Don’t adjust your eyes. You didn’t misread that. Of course, someone’s going to have to pop £15 on the rulebook, too, but that’s it.

IMG_1178 copy

The minis are incredible. At 10mm scale you might worry that things are going to get clunky, but Dave Lewis of Hawk Wargames has done an amazing job. Vehicles were sculpted digitally, and are so detailed that tanks have tiny moveable parts. Troops were done the old-fashioned way – by hand – and yet these absolutely miniscule figures are superb (and too small for my 50mm macro lens to get a fix on).

IMG_1181 copy

It’s called DropZone Commander with good reason: The scale may be 10mm, but your battlefield is, for medium-sized games, 48X48mm. That’s only two feet shorter than your average 40K table, and your troops are not going to run their little legs off crossing all that on their own. Even wheeled / tracked vehicles are sitting out in the open for too long. No, you’re going to need to airlift your army into position with Dropships, or they aren’t going to make it.

IMG_1189 copy

We’ve used books for buildings in this game: Dropships in flight are measured as being 6″ from the table surface, so it’s important to know how tall your structures are. But DZC tactics can also rely heavily on destroying buildings, so books gave us the ability to remove layers and leave the foundations in place. Hawk Wargames has – for free, mind you – gorgeous buildings that you can download from their website and print onto stiff card.

Yes, again! I’m not having a seizure, I’m not making this up! A games company which gives you free support from its website, and even encourages fan-made extras! Stick with me on this one.

IMG_1188 copy

The armies from this particular game were the United Colonies of Mankind (UCM), and PostHuman Republic (PHR). There are currently four armies in total: The UCM are the remains of the once-great Human empire; the PHR split off and are now cyborgs; the Scourge are body-thieving parasites; and the Shaltari are ancient and advanced aliens. Flavour-wise the UCM are sorta kinda Imperial Guard-ish, the PHR are a bit Tau-ish, the Scourge are Tyranid-like, and the Shaltari are vaguely Eldar. Play-styles, though, are entirely different.

IMG_1202 copy

The obligatory size comparison shows a Tactical Marine between a PHR Janus Scout Walker, the smallest Walker the PHR have, and a PHR Neptune Medium Dropship.

I like it. I like it so much that I’m picking up a Premium Shaltari Mega Army in the next few weeks. In fact, I’ve been terribly cheeky and asked Mr. Troo if I can have it for my birthday. So you can expect to see a lot more of DZC on this blog over the coming months (or years).

Tagged , , ,

40k: Grey Knights vs Imperial Guard vs Eldar

Morning all,

I was supposed to be playing a game of Warhammer 40K this weekend, but I wasn’t feeling too well, so I ended up spectating.

The chaps went for a 1,000pt three-way game with rules of Mike’s devising, the gist of which are:

  • One central objective worth 5 victory points
  • One objective in each player’s deployment zone worth 3 points if you hold your own, or 4 points each if you capture one which wasn’t yours to begin with.
  • Kill points for wiping out a unit, or when a unit dies but you killed the majority of it. If two players draw, the last player to kill a model in that unit scoops the point.
  • No First Blood (because the player going third is at an unfair disadvantage).
  • No Warlord Powers.

 The chaps have already uploaded the battle report, so without further ado, here it is.

Tagged , , , , ,